Archive for May, 2007|Monthly archive page
Outboard, Part 5: I give up.
 Leave a comment
So here is hopefully the end of the outboard story. After my last post on this topic, I had another test session with the motor hanging in a trash can full of water. This time, I wanted to put the motor in gear and see if that help keep the revs steady. Instead, the motor died as soon as I threw it into forward. Worse – I couldn’t restart. The motor cranked and cranked but would not fire. Over the next few days, I tried a few things but nothing worked.
So yesterday I lifted my 1991 Johnson 15hp off the transom and took it to the engine shop at the local marina. I’ve had to call the boat hauler and delay my launch date, but at least I’ve got some professionals working on the motor. In the end, I expect I’ll have a more reliable outboard and that’s probably worth a week or two of sailing at the beginning of the season.
Winches
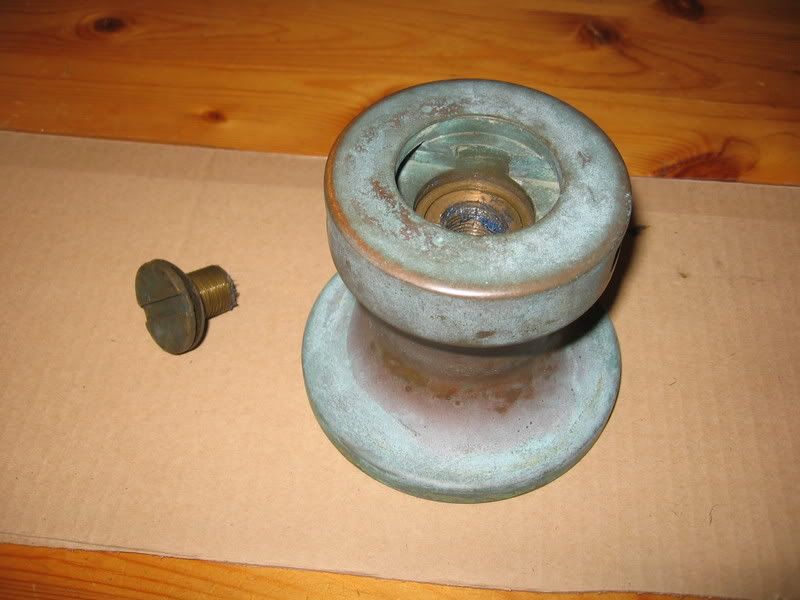
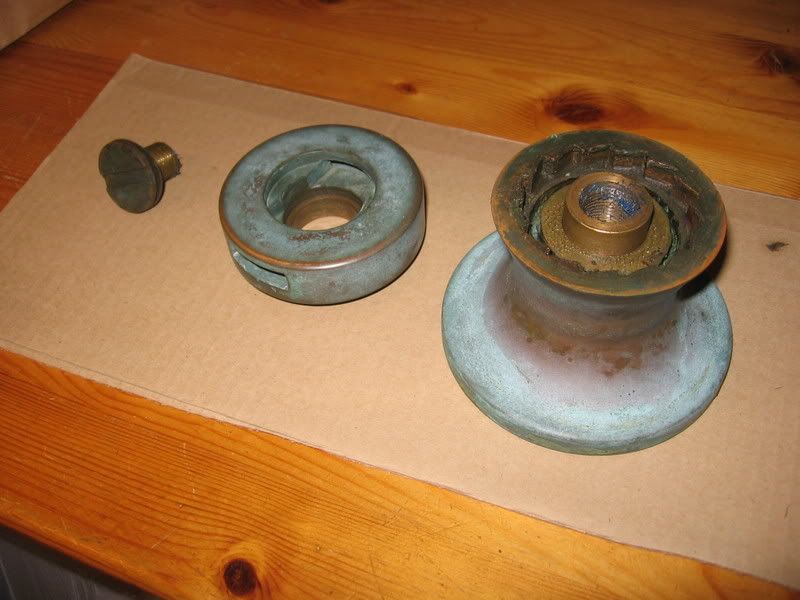
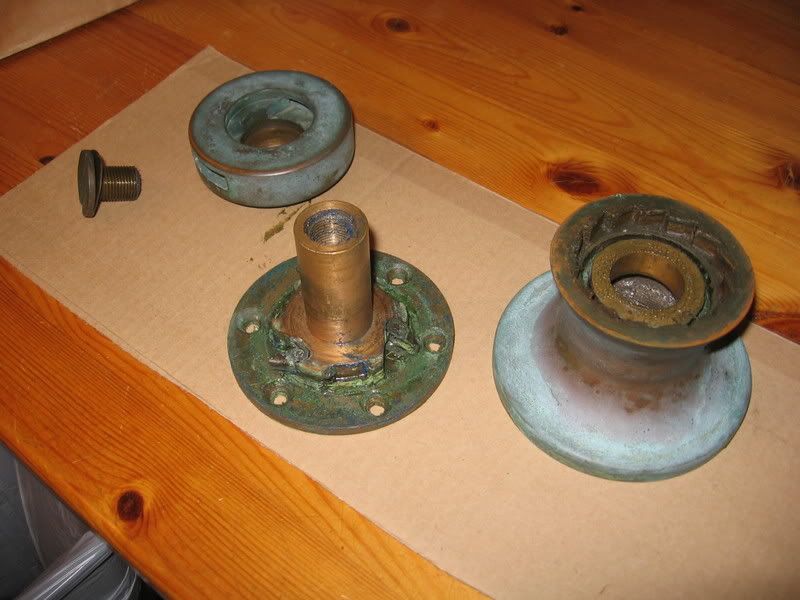
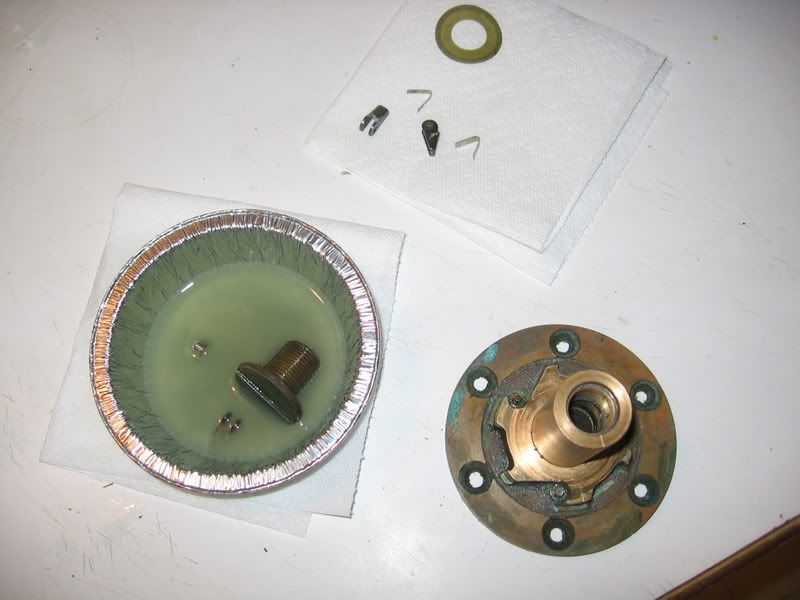
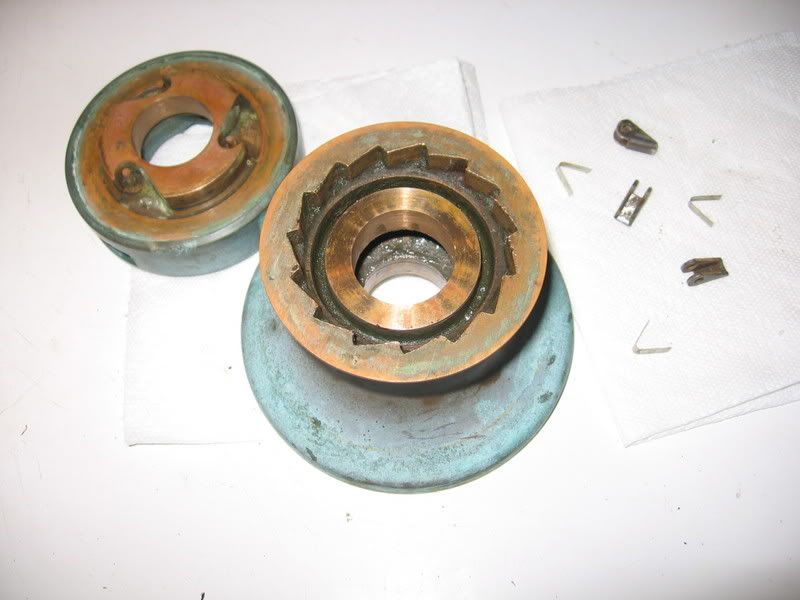
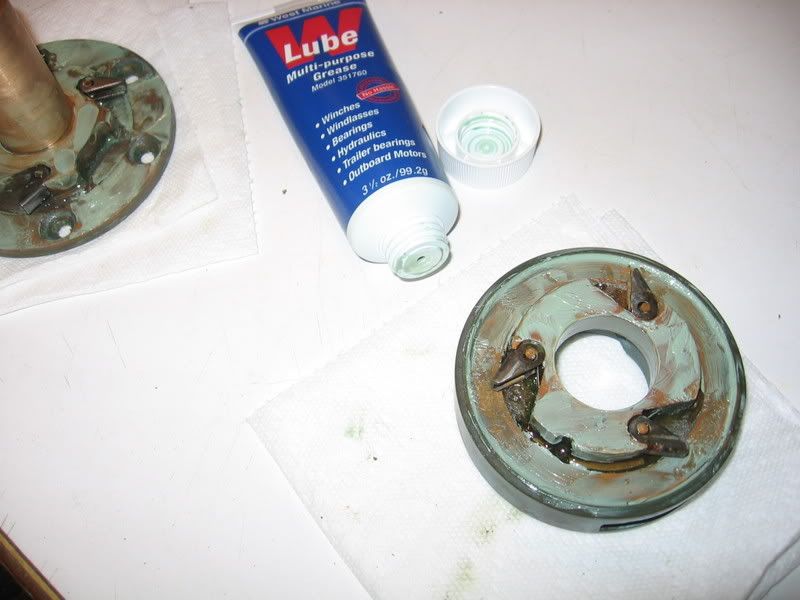
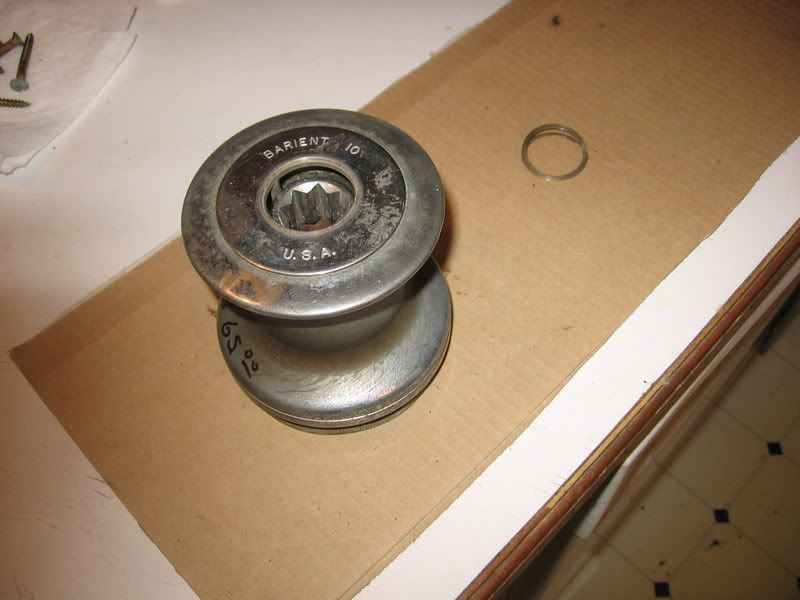
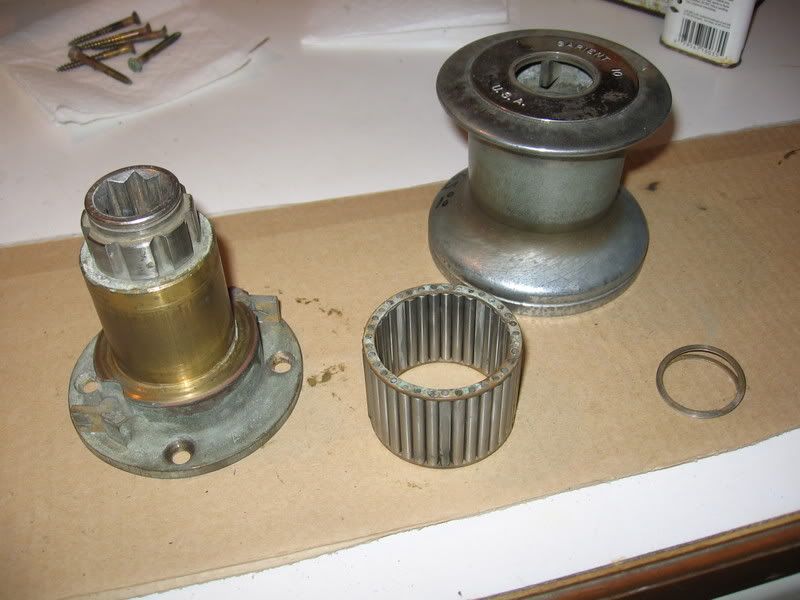
I spent the winter looking for a used winch to replace the one that broke last fall. I could never find a matching Wilcox-Crittenden #2, so I settled on a reasonably priced Barient winch that I found at Marine Consignment of Wickford. Now I can sail while I continue the search for the matching winch.
A few nights ago I took both winches apart, cleaned the old gunky grease out and lubed them up with fresh West Marine winch grease.
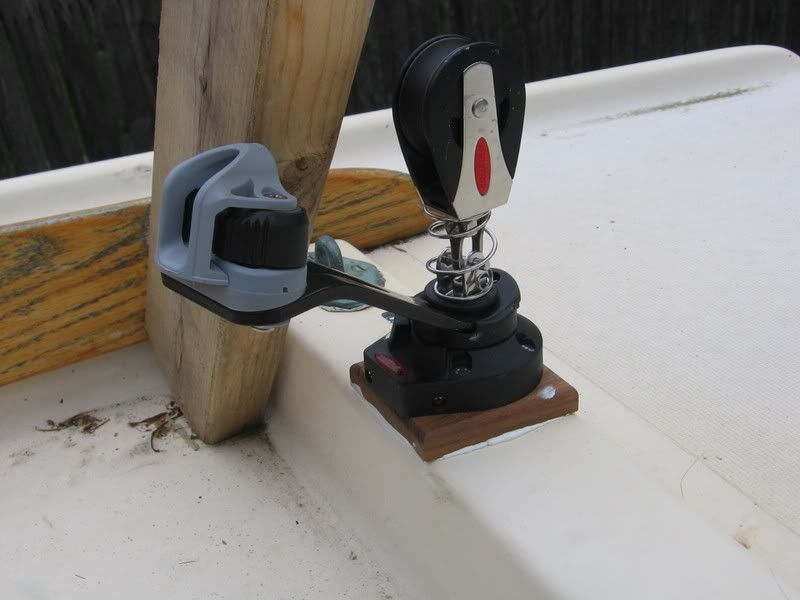
New mainsheet system
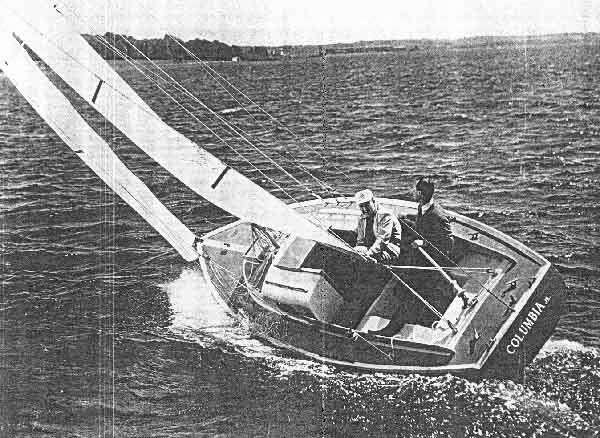
This is a photo of Carl Alberg and Clint Pearson sailing an Electra, presumably on Narragansett Bay. (I got the picture from Ken Jolly’s excellent Electra website.) Aside from being an interesting documentation of the designer and builder out enjoying one of their sailboats, it also shows an arrangement for the mainsheet system that is very different from the one that came on Dragonfly:
Not only was this a strictly vertical arrangement involving only two blocks, it also lacked any sort of cleat. The previous owner had wrapped the mainsheet around the tiller whenever he had needed two free hands, which is not ideal. It’s also just plain tiring to be pulling on the mainsheet during an entire voyage!
So I wanted to add a cleat and also return to an arrangement that resembled the one in the photo of Carl and Clint. I surfed around and found this drawing:
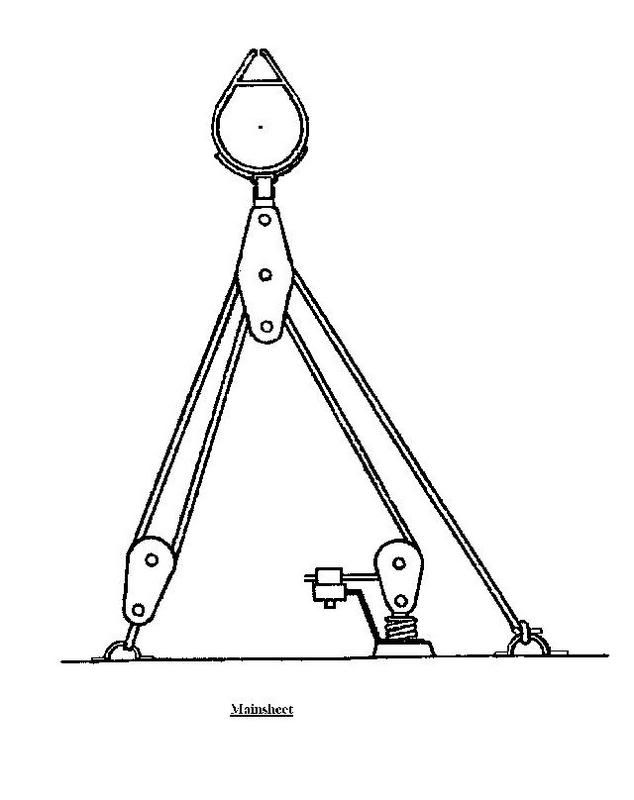
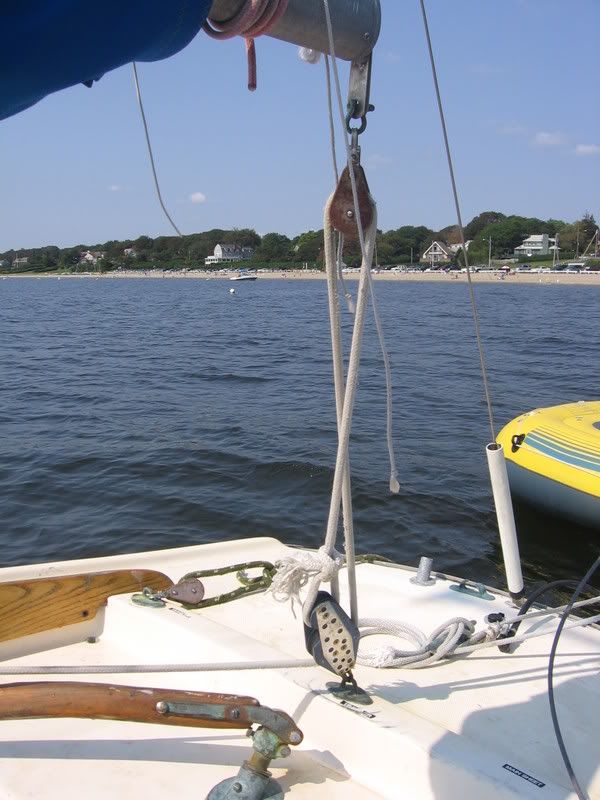
The nice thing about this design was that I already had everything I needed: pad-eyes at the back of the cockpit and a double block for the end of the boom. All I needed to purchase was a swivel block w/ a cam cleat which I purchased over the winter.
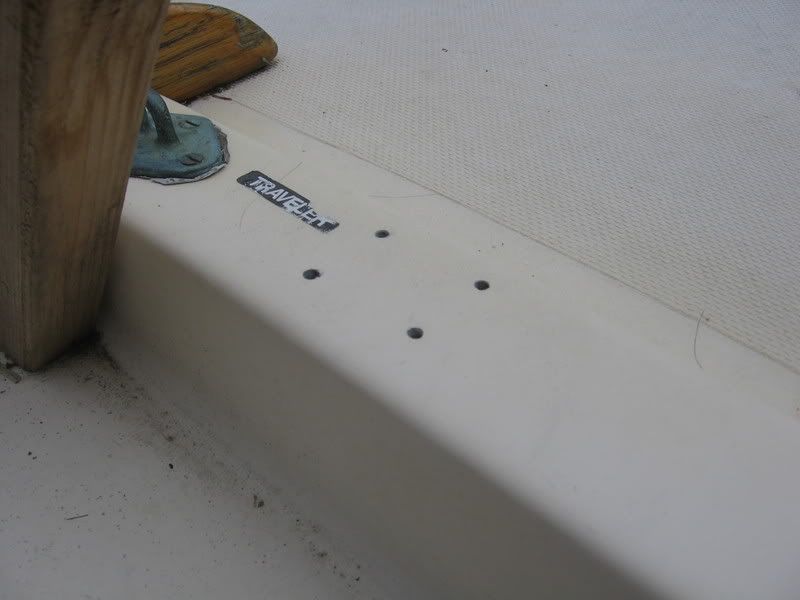
I needed help from a couple of people to really pull this off. First, Brian took some of the teak that he’s using to build the new hatch and made a 3″ x 3″ pad to mount on the coaming. Next, I marked and drilled holes:
The next part would have been tricky because I’m too big to crawl to the back of the cockpit inside the boat. This is why it is good to have children! My son crawled back into the transom with a socket driver. After I gooped up the underside of the teak with polysulfide, I held the bolts steady with a screwdriver while Kellan tightened the nuts and washers from below. The final result is exactly what I was hoping for:
Another project checked off the list!
Outboard, Part 4
I’ve assumed that all problems with the outboard are electrical, which is why I’ve concentrated on repairing the power cable. With that part finished it was time to test the motor.
I bought a battery charger last fall so I charged the battery and installed it in the cockpit locker. Then I got 5 gallons of fresh gas and mixed it with synthetic engine oil at a 50:1 ratio. I also added some stabilizer and carb cleaner to the gas.
I have no desire to take the motor off the boat, so I improvised a test tank using a trash can full of water and two tree stumps:
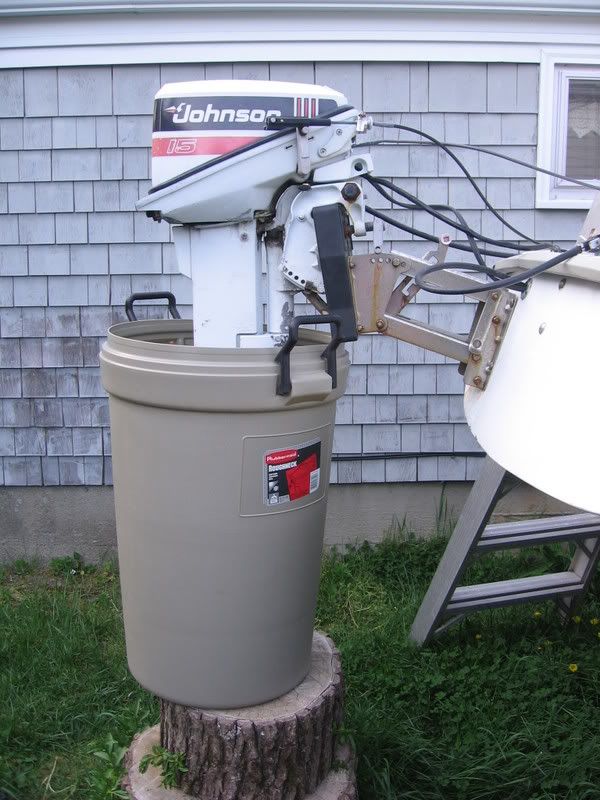
With everything in place I turned the key on the cockpit remote unit. The motor turned over immediately but then died. By fiddling with the throttle and choke, I was able to idle the motor for as long as two minutes. There was also a fair amount of smoke.
There is a fuel mixture knob on the front of the motor so hopefully that will help with the smoke. The bigger concern is getting the motor to idle. The previous owner acknowledged that it was a tricky thing to do. What he advised was using the throttle to get the motor running at the proper revs and once that is achieved for 3 or 4 seconds just throw it into gear and go. The motor doesn’t seem to die when its in gear.
So the electrical problems have been fixed but further testing is necessary.
Outboard, Part 3
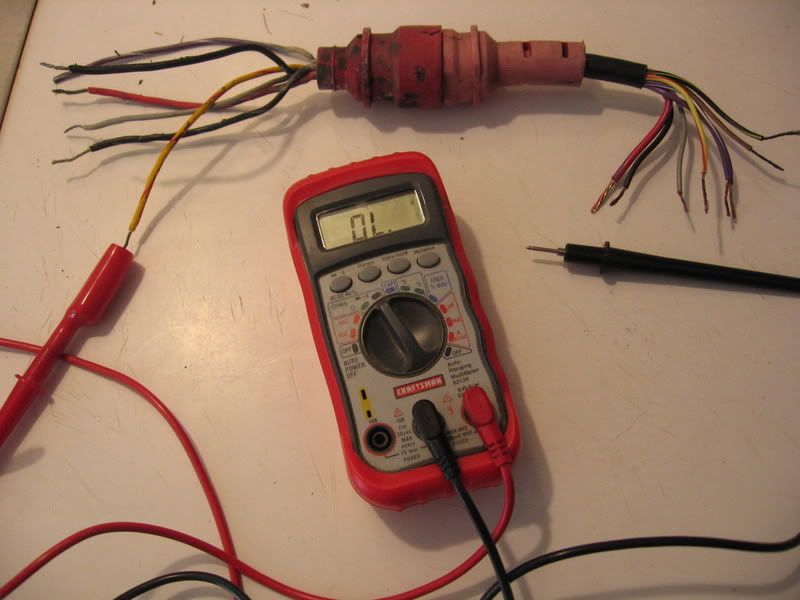
There are six wires inside the power cables that run from the outboard motor and from the remote control in the cockpit. The extension cord that was spliced in has eight wires inside. Also, most of the wire colors are the same in all three sections but there are some that are different. So before I can get rid of the red plug I have to know which wires should be spliced together inside my new cable.
Since the motor started and ran last season, I know that the current connections are correct. Therefore, I need to note the what is connected to what in the remote/extension splice. I also need to no which wire connect inside the red plug. To do that, I needed to borrow a circuit tester from Brian.
Step 1: Cut out the red plug.
Step 2: Remove the outside covering of the cable.
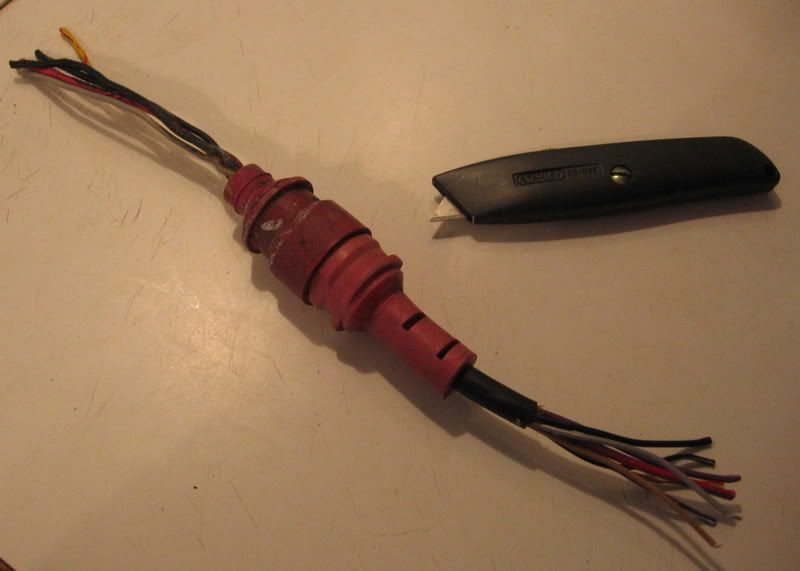
Step 3: Strip the ends of each wire.
Step 4: Hook up the tester and record which wire combinations produce a circuit.
I also found a forum post which listed the functions of each wire (thank you Google!):
Purple/white – choke, Red/purple – battery+, Yellow/red – start, Black/yellow – stop, Black – ground, Gray – tachometer.
Now, I don’t have a tach so I only needed to connect five wires in my splice and I should have all the functions covered.
I didn’t take any pictures of the next phase, but Kellan and I connected the five wires with heat-shrink butt connectors, loosely wrapped the wires with electrical tape, put a heat shrink covering over everything, and then wrapped the whole mess tightly with electrical tape. It doesn’t look great, but it’s better than that big loop of cable sitting on the seat.
Outboard, Part 2
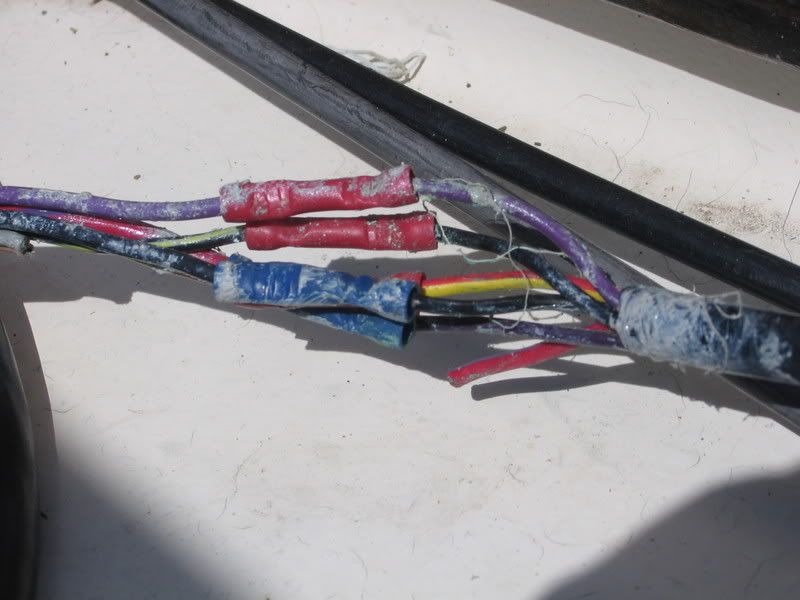
The next part of the outboard motor project was to fix the power cable which runs from the outboard to the remote controller in the cockpit. For some reason, a gigantic length of extension cable had been spliced onto the original cable that comes out of the remote:
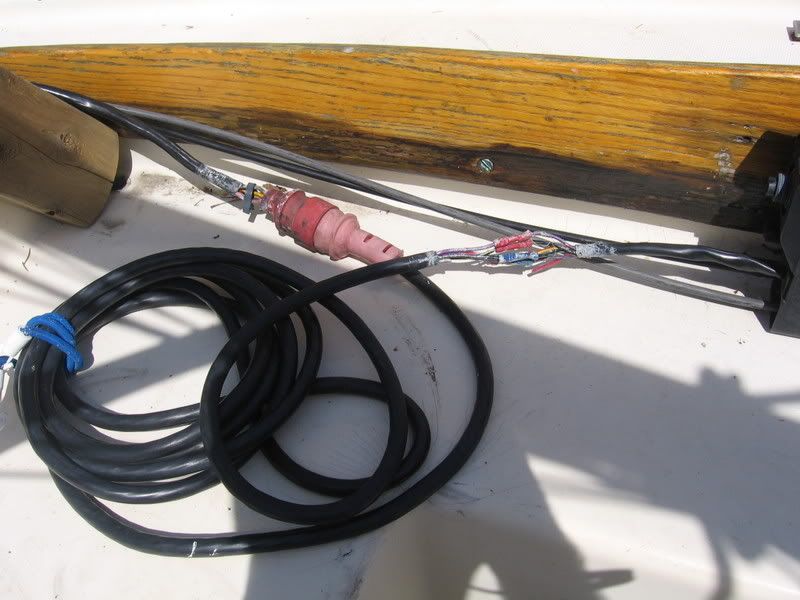
After peeling off the strange “camo” tape around the splice, I found that one of the splices had failed. Check out the red wire:
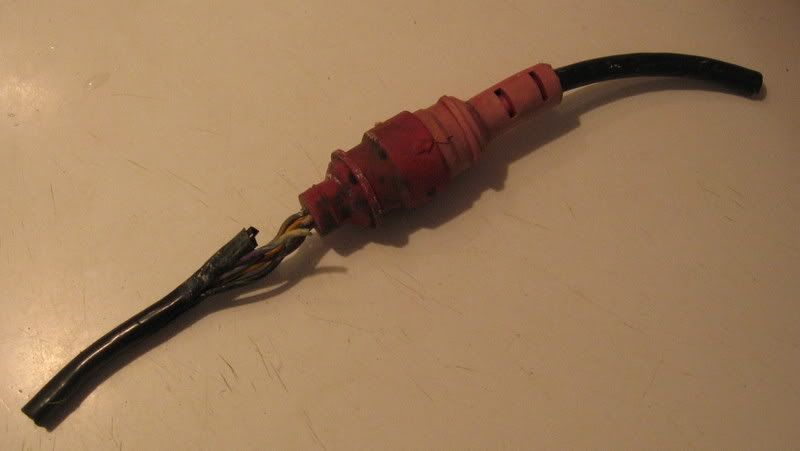
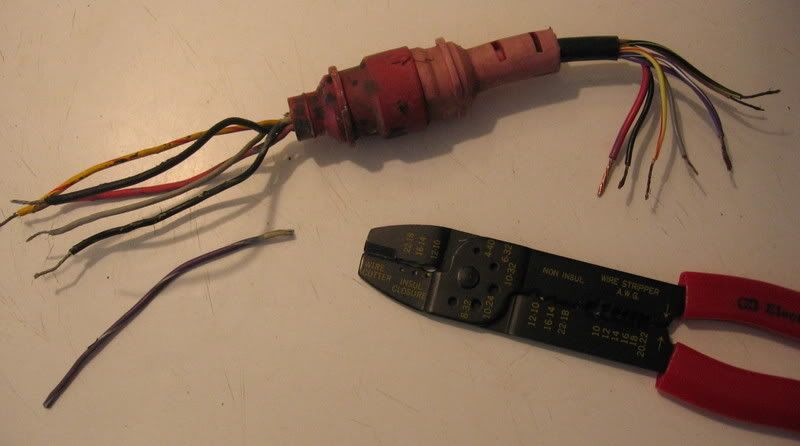
There was trouble at the other end as well. My motor and remote were connected by a big multi-pin plug. It looks like this:

This was a feature of Johnson/Evinrude electric start outboards in the 80’s and early 90’s. (I assume the goal of the “red plug” system was to make it easy to swap one Johnson or Evinrude motor for another – sort of a “plug n’ play” for the outboard motor crowd.) Anyway, the problem was that a wire from the outboard end had failed right at the base of the red plug:
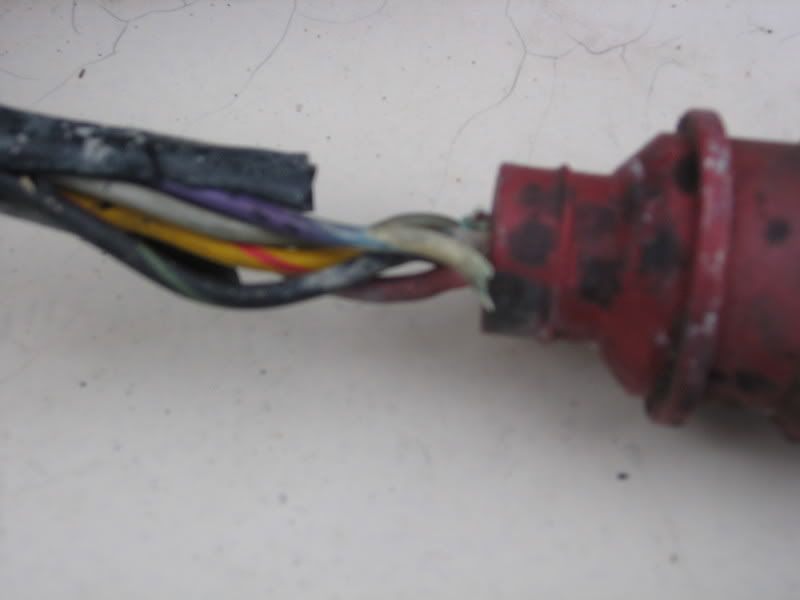
That last picture is out of focus, but trust me – the purple and white wire doesn’t connect to the plug! Because there was no way to open the plug itself (each side is one molded piece), there was no way to reconnect the purple/white wire to the plug.
So the plan is to cut the red plug out altogether. Afterall, I only have the one motor and I’m not planning on swapping in another. I’m going to use a section of the big extension cable and splice it into the power cable. We’ll see how that goes. Stay tuned….
Outboard, Part 1
The time has come to deal with the outboard motor. At the end of last year, I was unable to start the motor. This led to a rather brave and ultimately triumphant sail up the Barrington River, but I don’t want to launch this year with a motor that won’t start. I don’t really like having a big ol’ outboard hanging off the transom, but for safety’s sake I want to get it functioning properly.
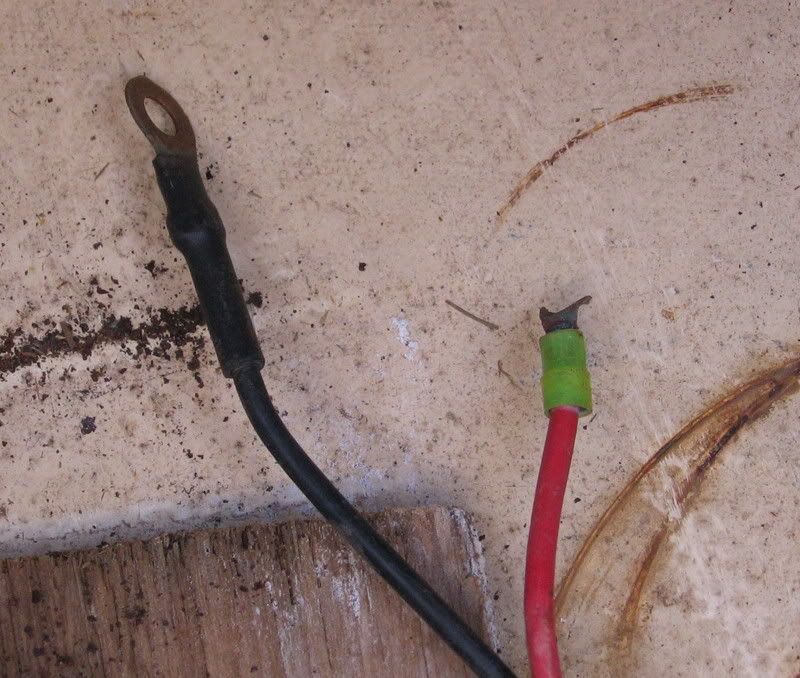
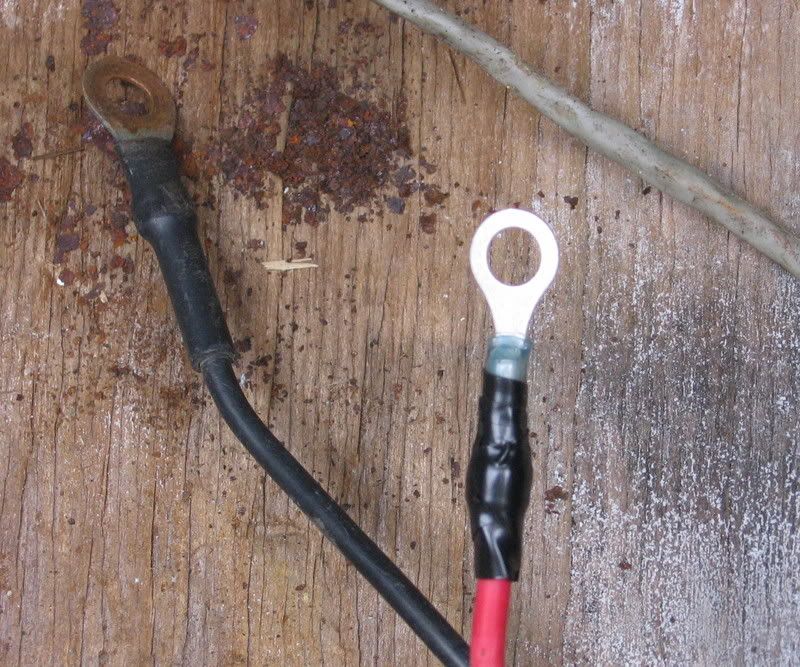
Step 1 was to replace a battery terminal that had corroded away to nothing more than a little nib.
Before: After:
 Continue reading
