Archive for the ‘Maintenance’ Category
Outboard, Part 4
 Comments (1)
I’ve assumed that all problems with the outboard are electrical, which is why I’ve concentrated on repairing the power cable. With that part finished it was time to test the motor.
I bought a battery charger last fall so I charged the battery and installed it in the cockpit locker. Then I got 5 gallons of fresh gas and mixed it with synthetic engine oil at a 50:1 ratio. I also added some stabilizer and carb cleaner to the gas.
I have no desire to take the motor off the boat, so I improvised a test tank using a trash can full of water and two tree stumps:
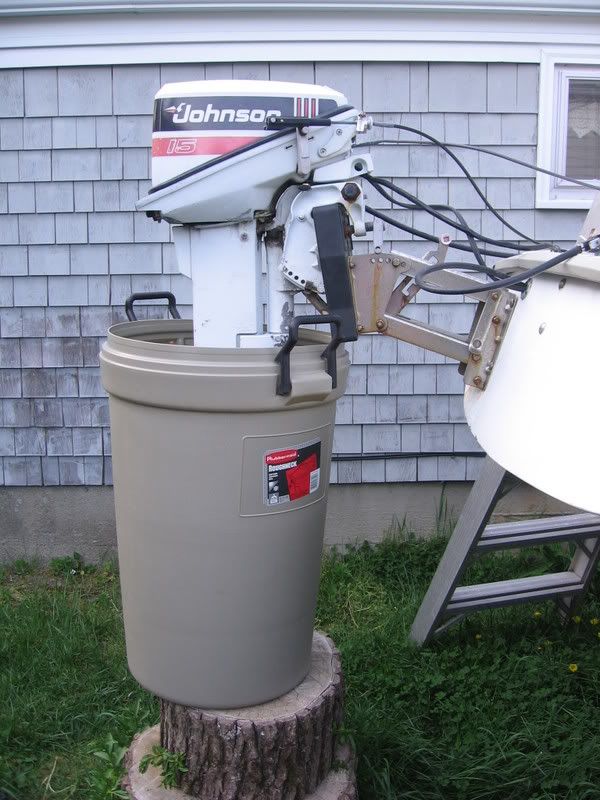
With everything in place I turned the key on the cockpit remote unit. The motor turned over immediately but then died. By fiddling with the throttle and choke, I was able to idle the motor for as long as two minutes. There was also a fair amount of smoke.
There is a fuel mixture knob on the front of the motor so hopefully that will help with the smoke. The bigger concern is getting the motor to idle. The previous owner acknowledged that it was a tricky thing to do. What he advised was using the throttle to get the motor running at the proper revs and once that is achieved for 3 or 4 seconds just throw it into gear and go. The motor doesn’t seem to die when its in gear.
So the electrical problems have been fixed but further testing is necessary.
Outboard, Part 3
There are six wires inside the power cables that run from the outboard motor and from the remote control in the cockpit. The extension cord that was spliced in has eight wires inside. Also, most of the wire colors are the same in all three sections but there are some that are different. So before I can get rid of the red plug I have to know which wires should be spliced together inside my new cable.
Since the motor started and ran last season, I know that the current connections are correct. Therefore, I need to note the what is connected to what in the remote/extension splice. I also need to no which wire connect inside the red plug. To do that, I needed to borrow a circuit tester from Brian.
Step 1: Cut out the red plug.
Step 2: Remove the outside covering of the cable.
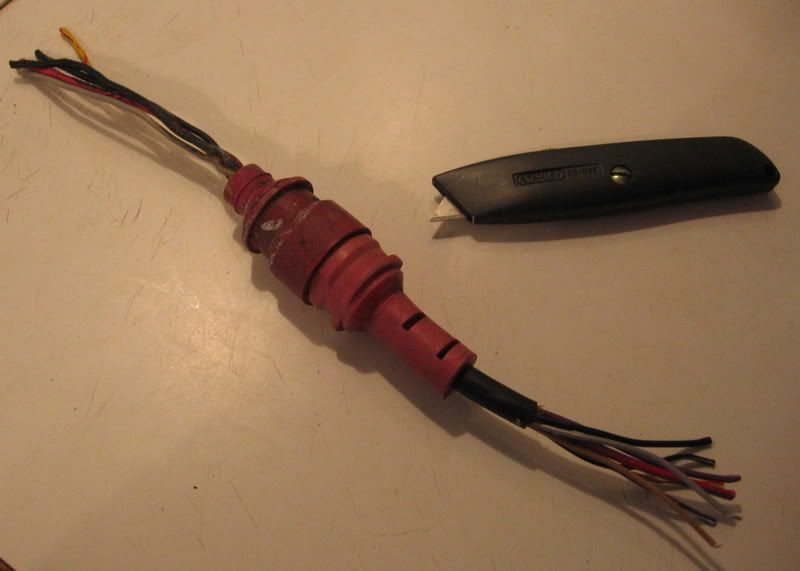
Step 3: Strip the ends of each wire.
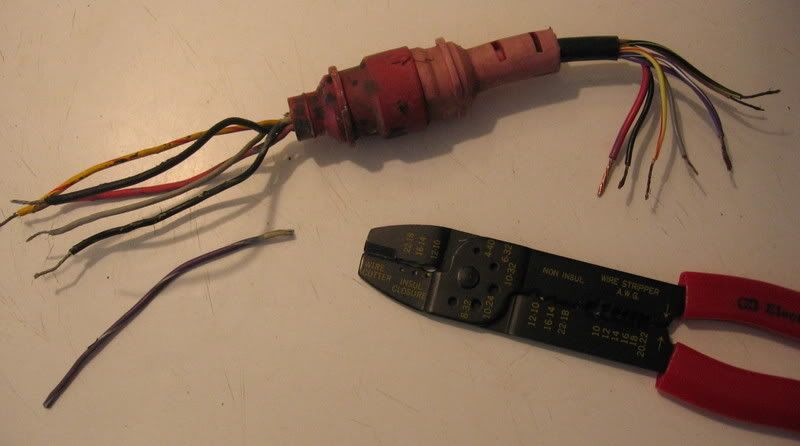
Step 4: Hook up the tester and record which wire combinations produce a circuit.
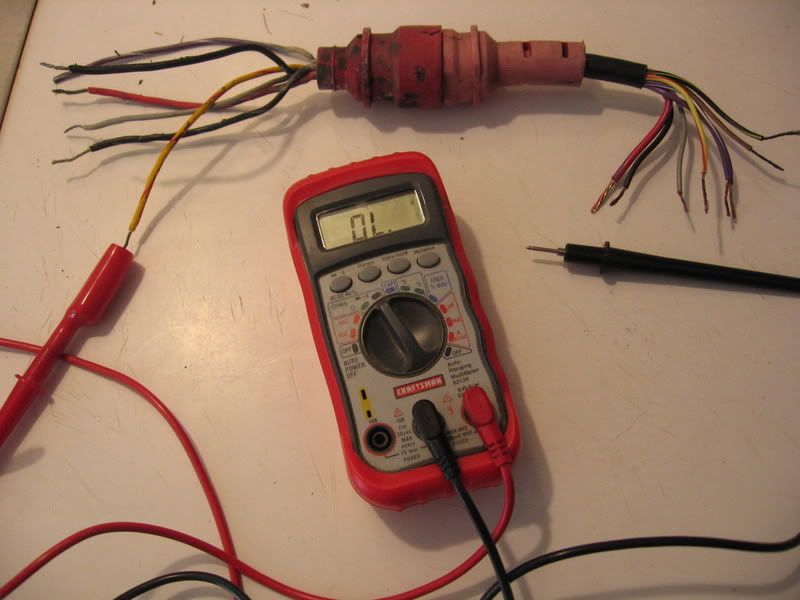
I also found a forum post which listed the functions of each wire (thank you Google!):
Purple/white – choke, Red/purple – battery+, Yellow/red – start, Black/yellow – stop, Black – ground, Gray – tachometer.
Now, I don’t have a tach so I only needed to connect five wires in my splice and I should have all the functions covered.
I didn’t take any pictures of the next phase, but Kellan and I connected the five wires with heat-shrink butt connectors, loosely wrapped the wires with electrical tape, put a heat shrink covering over everything, and then wrapped the whole mess tightly with electrical tape. It doesn’t look great, but it’s better than that big loop of cable sitting on the seat.
Outboard, Part 2
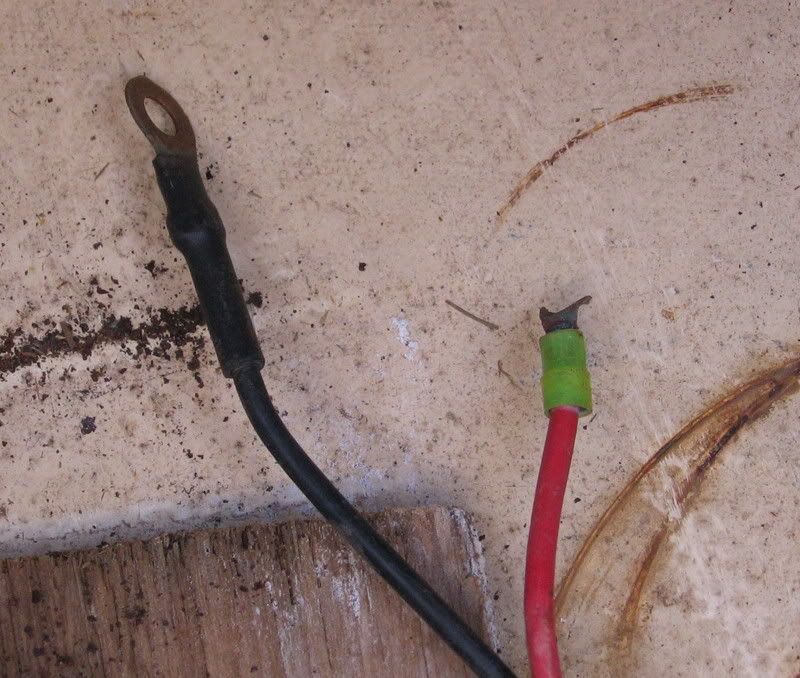
The next part of the outboard motor project was to fix the power cable which runs from the outboard to the remote controller in the cockpit. For some reason, a gigantic length of extension cable had been spliced onto the original cable that comes out of the remote:
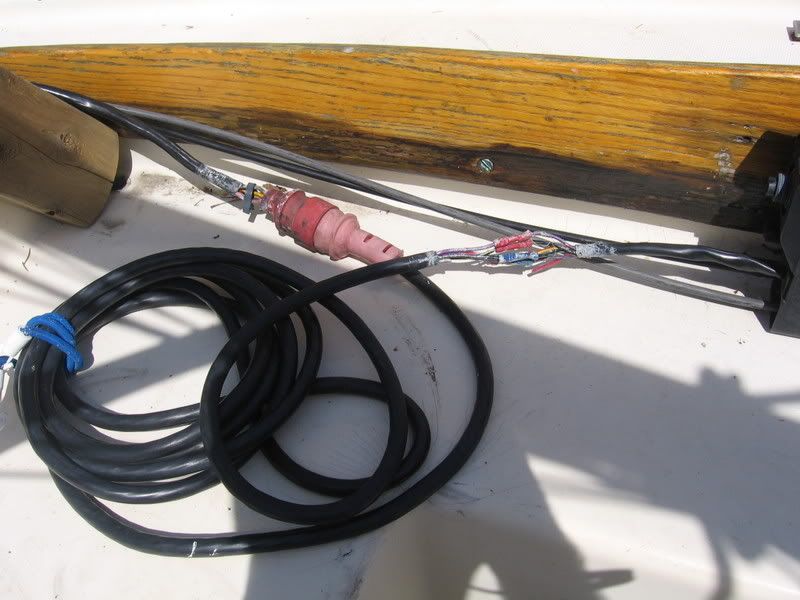
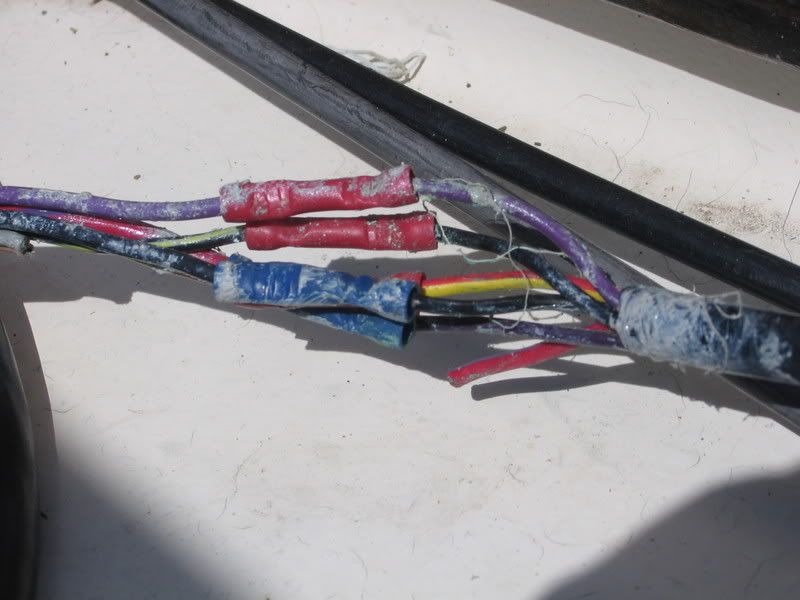
After peeling off the strange “camo” tape around the splice, I found that one of the splices had failed. Check out the red wire:
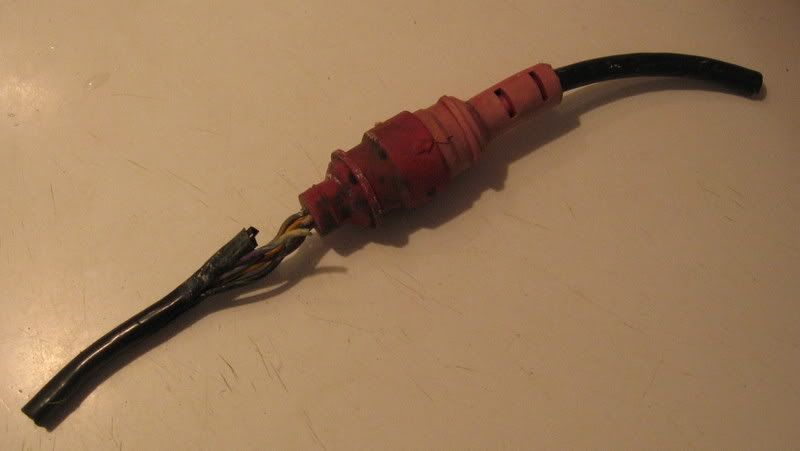
There was trouble at the other end as well. My motor and remote were connected by a big multi-pin plug. It looks like this:

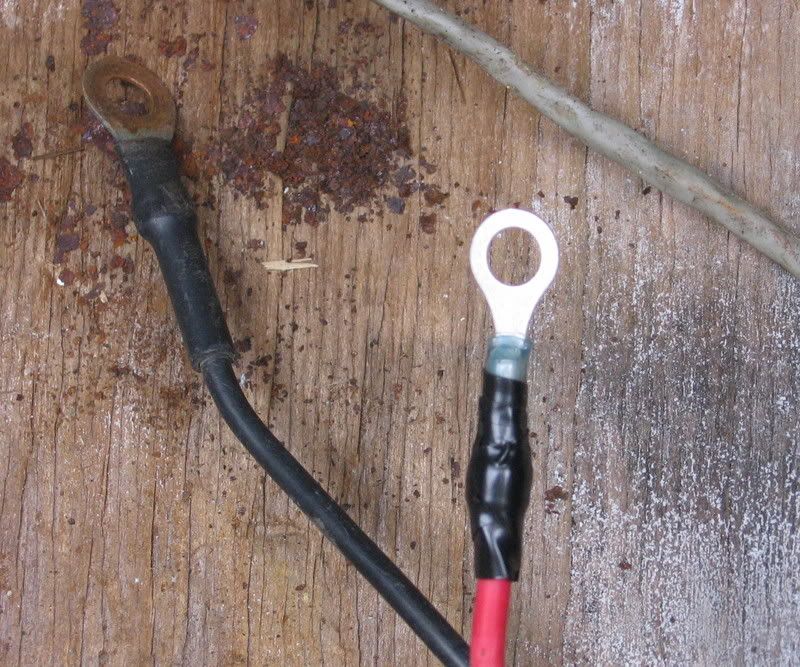
This was a feature of Johnson/Evinrude electric start outboards in the 80’s and early 90’s. (I assume the goal of the “red plug” system was to make it easy to swap one Johnson or Evinrude motor for another – sort of a “plug n’ play” for the outboard motor crowd.) Anyway, the problem was that a wire from the outboard end had failed right at the base of the red plug:
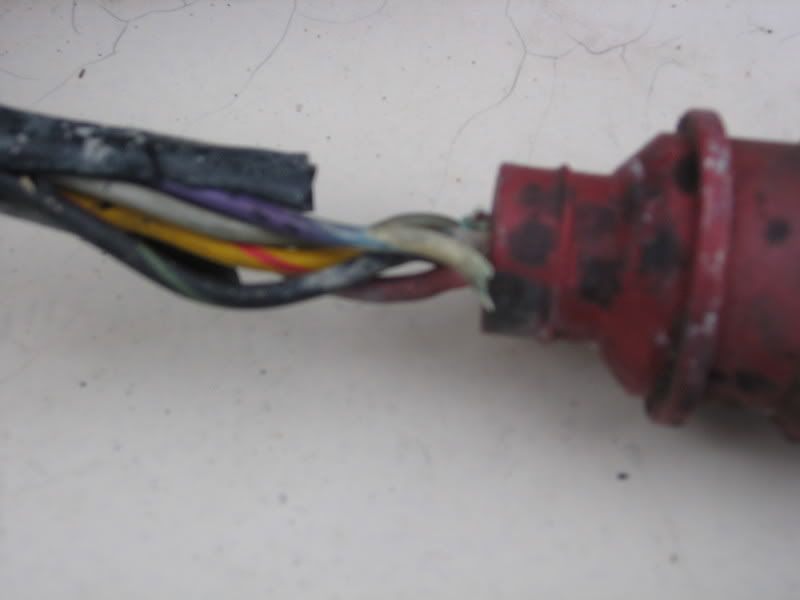
That last picture is out of focus, but trust me – the purple and white wire doesn’t connect to the plug! Because there was no way to open the plug itself (each side is one molded piece), there was no way to reconnect the purple/white wire to the plug.
So the plan is to cut the red plug out altogether. Afterall, I only have the one motor and I’m not planning on swapping in another. I’m going to use a section of the big extension cable and splice it into the power cable. We’ll see how that goes. Stay tuned….
Outboard, Part 1
The time has come to deal with the outboard motor. At the end of last year, I was unable to start the motor. This led to a rather brave and ultimately triumphant sail up the Barrington River, but I don’t want to launch this year with a motor that won’t start. I don’t really like having a big ol’ outboard hanging off the transom, but for safety’s sake I want to get it functioning properly.
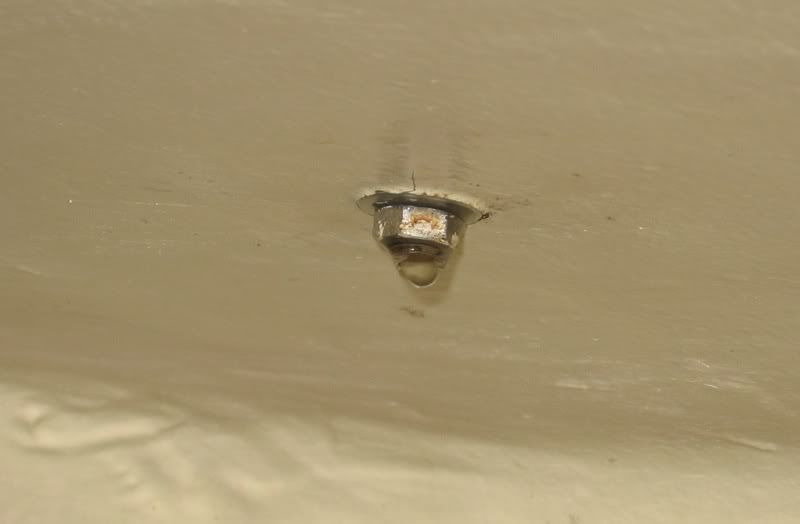
Step 1 was to replace a battery terminal that had corroded away to nothing more than a little nib.
Before: After:
 Continue reading
New hatch – Part 1
Sailing buddy Brian has been building a new forehatch for Dragonfly in his workshop. The old one had a serious crack in the frame and the caulk was all gunky.
To check out the progress so far, click here and then click the “view as slideshow” link just above the first photo.
Leaks
We had about an inch of rain on Thanksgiving. I’ve discovered a few leaks in the cabin top as a result. One is through a screw hole that is missing a screw. It’s supposed to be holding down the starboard hatch slide.
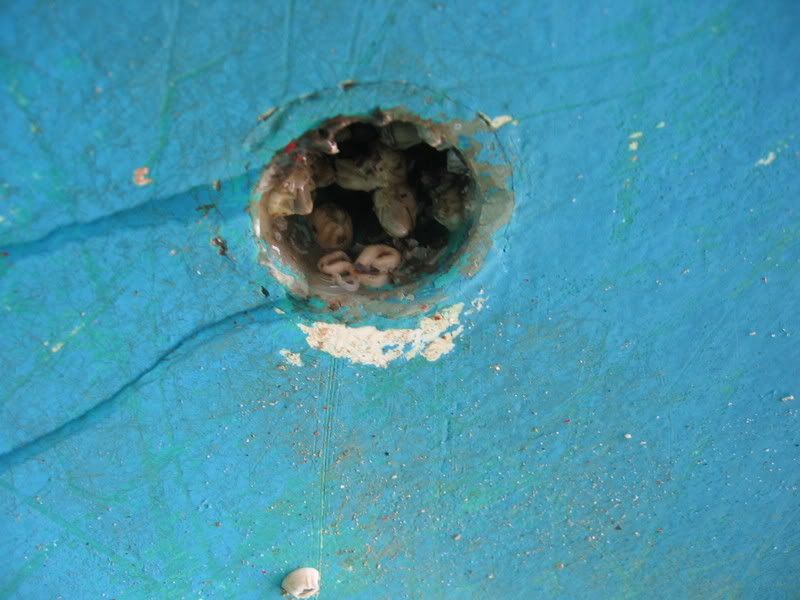
Another leak is coming down a bolt for the starboard cabin top rail. Here’s the photographic evidence:
This next photo is pretty blurry, but it’s supposed to show the water that is still under the cabin rails. This is after several hours in the sun. See the shiny water?
So it looks like I need to remove the cabin rails and the hatch slides and find something to seal the screw and bolt holes. Is there special marine caulk for this? Suggestions welcome in Comments.
Day after Thanksgiving
Happy Thanksgiving, everyone!
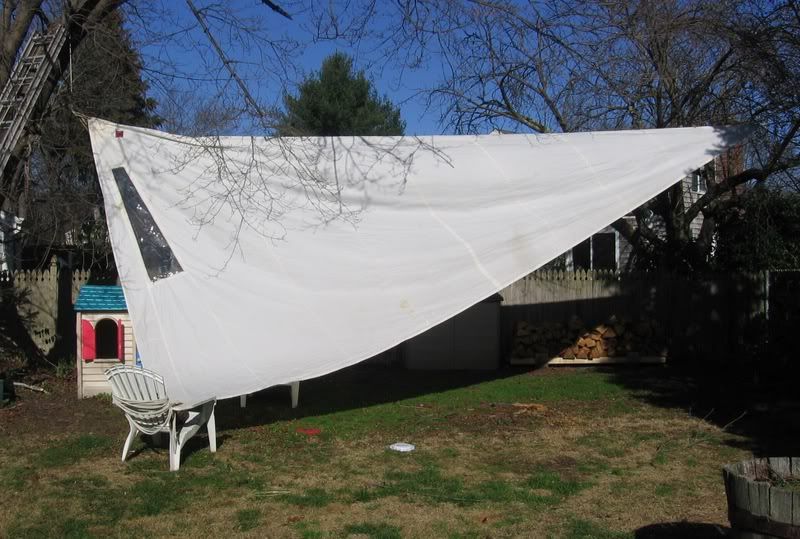
Today I got ready to store the sails by giving each of them a few hours to hang in the sunshine. I tossed a couple of lines over two tree branches and voila! It was a beautiful, breezy day – perfect for drying sails:
Next, I took a look at the clogged cockpit drain. It had been clear since I purchased Dragonfly that something was clogging one of the drains, but I couldn’t see what it was. Now that she is out of the water it was easy to see that barnacles were the culprit. In these pictures, you can see how the rainwater is not draining from the cockpit and the barnacles that were responsible.
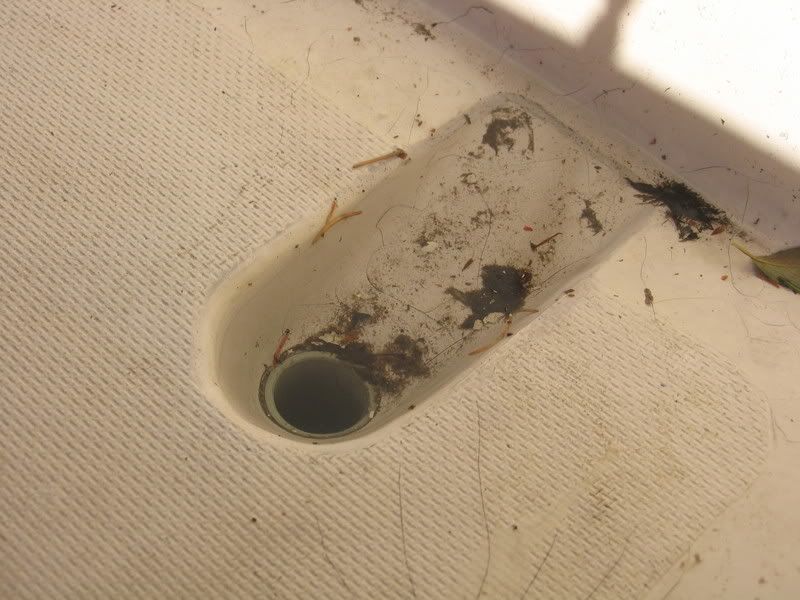
I used an awl and a wire coat hanger to scrape out the drain. It was pretty easy.
Fall cleaning
I spent last weekend taking all the boat junk out of the boat. Sails, anchor, lines, cushions, PFDs, etc. I put everything in the sun for a few hours before storing the majority on some plastic shelves on the back porch.
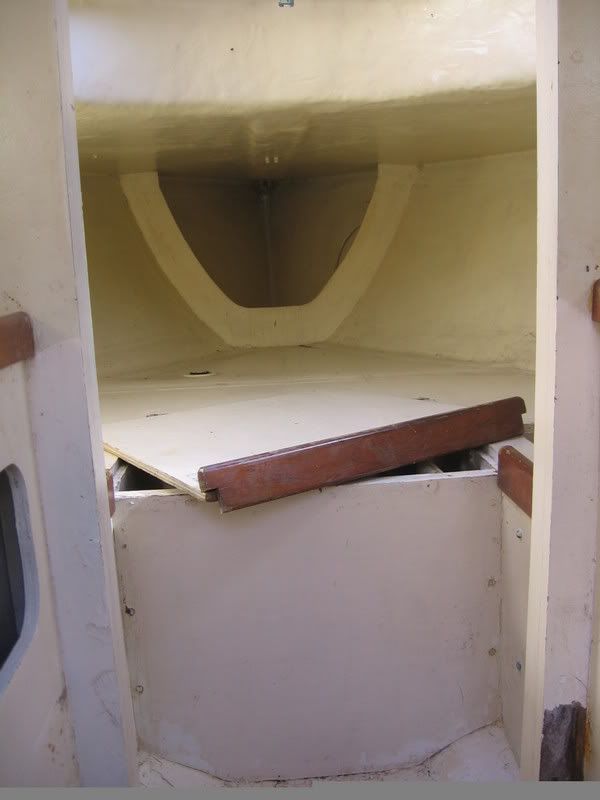
While the boat junk was getting the UV radiation treatment, I was below with a sponge and a pan of water and bleach. The battle against mildew has commenced! I stared in the bow and worked my way back towards the cockpit. I wiped as far as I could reach without actually crawling behind the ladder, which means I didn’t really finish but I was tired of all the contortions.
So now the forward cabin looks like this:
Catching up
It’s been a couple of weeks without a post so here’s what’s been happening:
1. Went sailing with my son. The plan was to run the motor for a bit, just to make sure everything was okay. Unfortunately, I couldn’t get it to start. Not even close. Sounded like a dead battery. Winds were light and manageable for us so we decided not to waste a trip out to the mooring. We raised the mainsail only and took a leisurely reach out towards Nayatt Point and back. In retrospect, we could have raised the jib as well.
2. It’s time to be thinking about hauling the boat for the winter. I’ve ordered boat stands from the mooring guy so we can store the boat in my side yard. (There is much to do and I’m more likely to do it if I see the boat every day!)
3. Battery again: I went out last weekend in a bit of chop to get the battery so I could have it charged. Unfortunately, I couldn’t release one of the wires. The nut and bolt are seized with rust. I’m going to try again this weekend with some WD-40 and a couple of bigger wrenches. Before I remove it, however, I’m going to sand the contacts on the other connection to try to improve the conductivity. It could be that the battery isn’t dead at all and that I just had a poor connection last time.
Broken winch
I think I broke the starboard side winch on Sunday. It was sticking a little and I gave it a good tug with the winch handle, when suddenly the top of the winch came off. Take a look at these pictures comparing the two winches and you’ll notice a circular crack in the starboard one. The bolt (nut? circlip?) which holds the top on has completely broken.
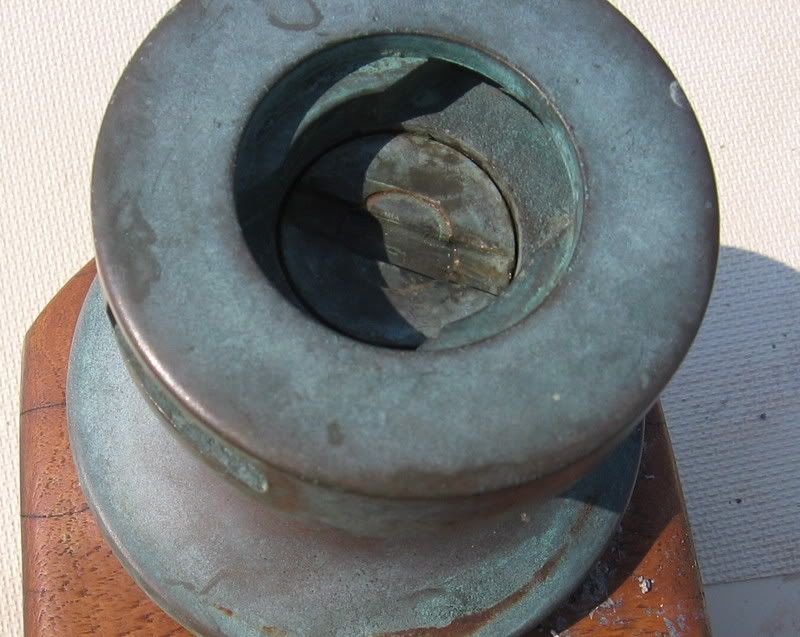
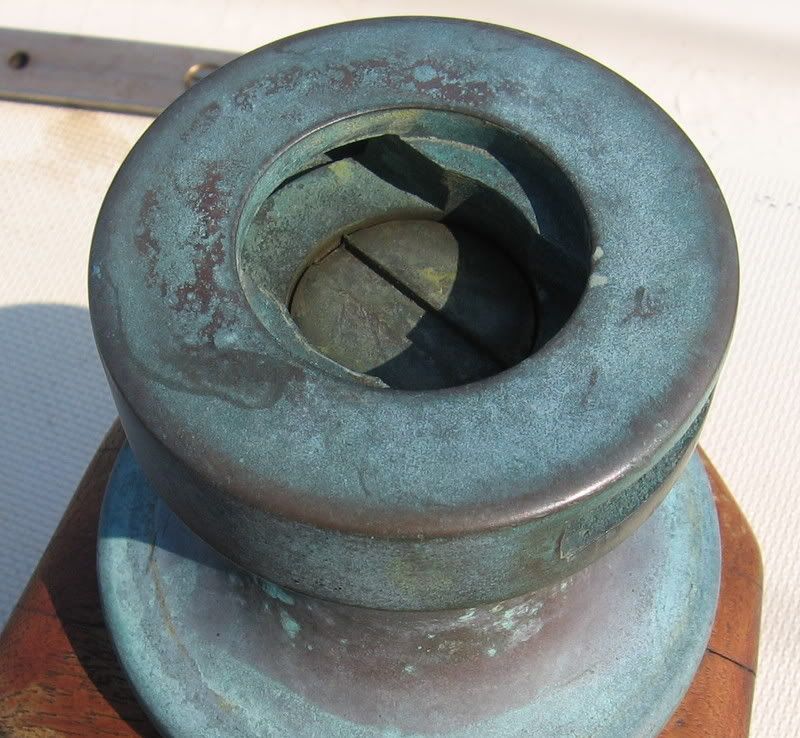
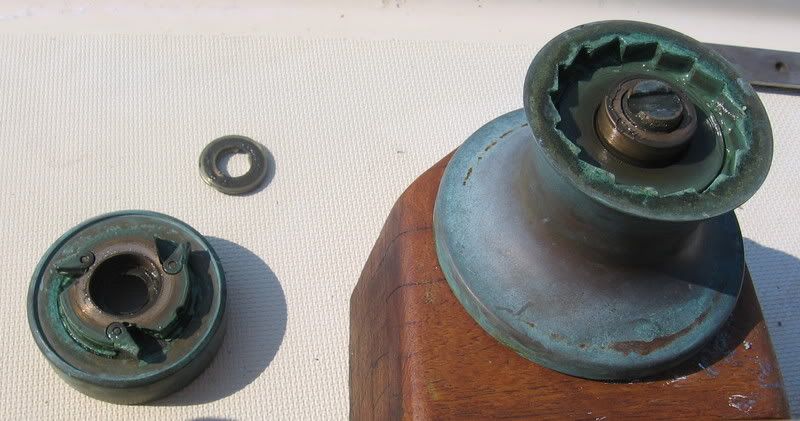
I can probably find a new winch in a consignment stop somewhere. Does anybody know who the manufacturer is? I was thinking that they are South Coast winches, but I don’t see the “South Coast” script in the top.
in the meantime I’m worried about sailing and possibly flipping the top of the starboard winch overboard. Maybe some duct tape?!?!
